Quickest first check: run the free Mac microphone test in your browser. If the level meter moves while you talk, the mic itself is fine and the problem is permissions or app settings — skip to step 2.
1. See If the Mac Can Hear You
Go to:
System Settings -> Sound -> Input
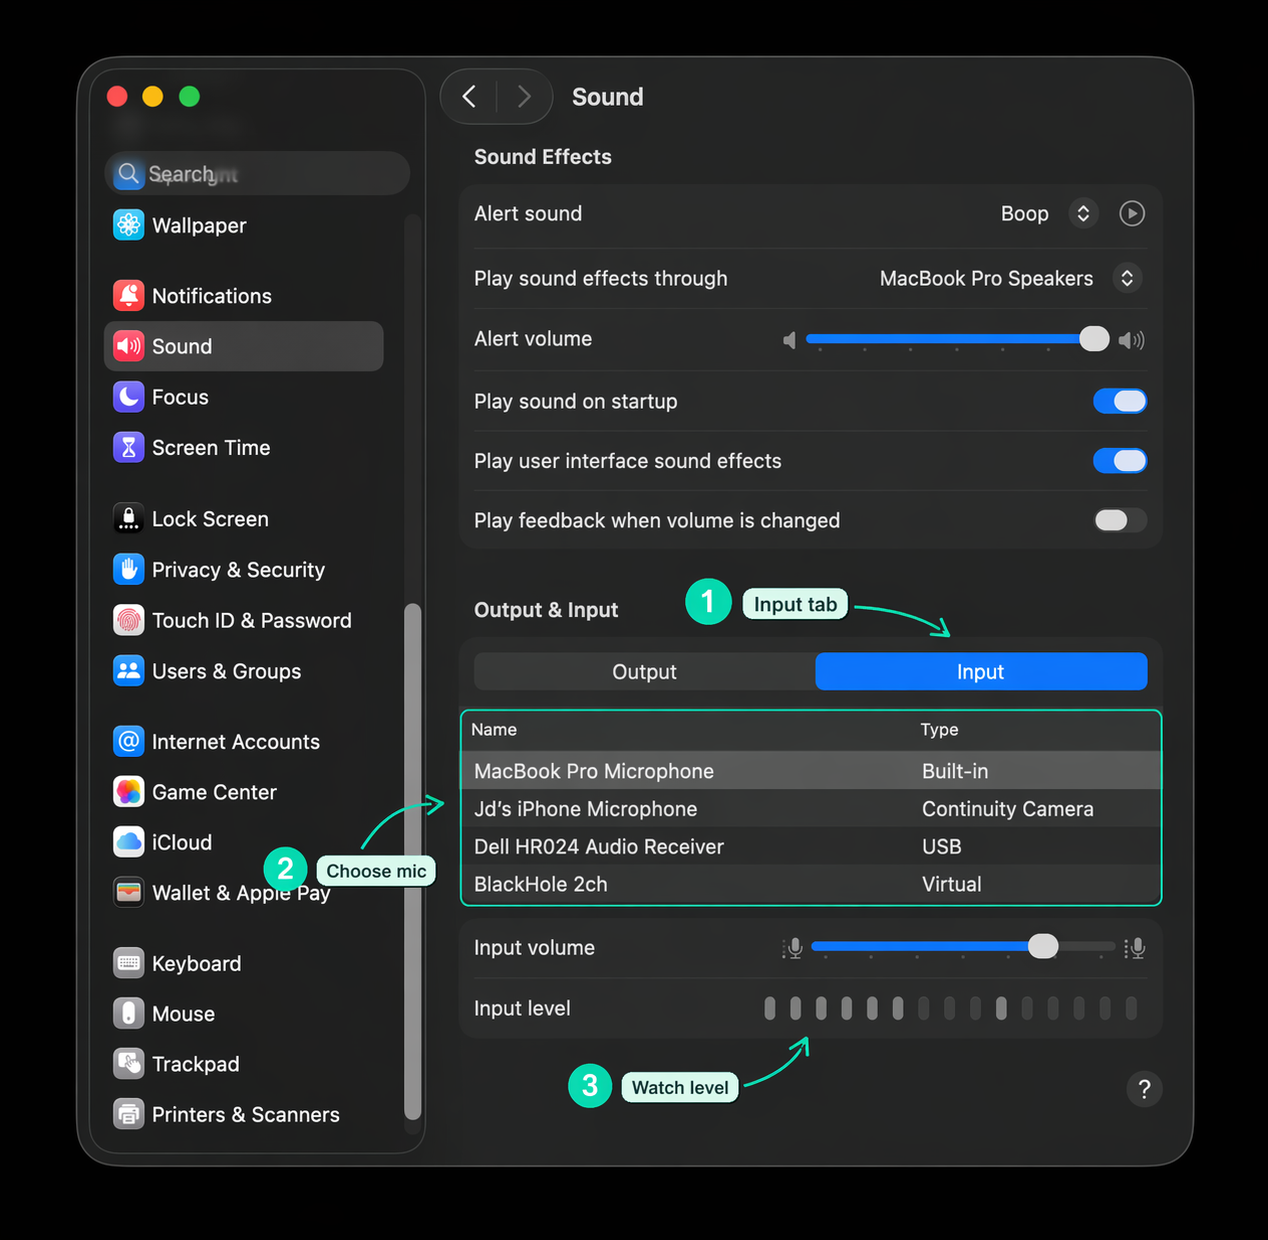
Select the microphone you intend to use, then speak at your normal dictation volume.
What to look for:
| What you see | What it means |
|---|---|
| Input level moves | The Mac can hear the microphone. Move to permissions. |
| Input level is flat | The Mac is not hearing that microphone. |
| Wrong microphone is selected | Dictation may be listening to a headset, monitor, or dock instead of the built-in mic. |
If the level is flat, switch to another input device and back again. This often resets a stuck Bluetooth or USB audio path.
2. Check Microphone Permission
Go to:
System Settings -> Privacy & Security -> Microphone
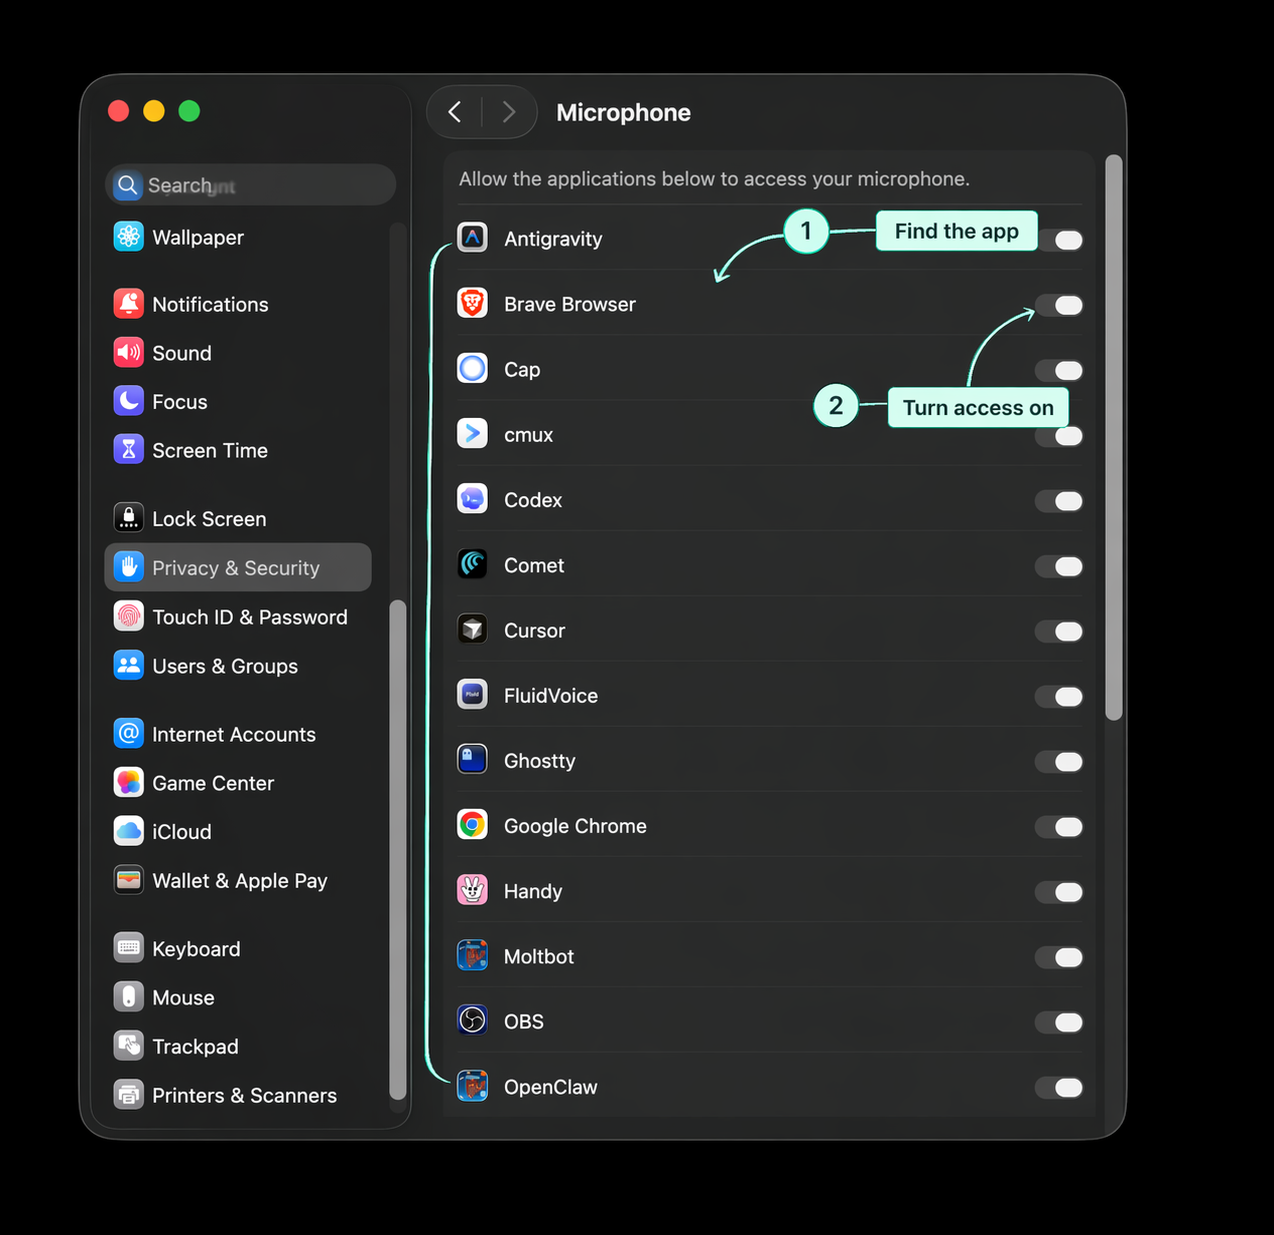
Turn on microphone access for the app that needs to listen.
For Apple Dictation, this may be the app where you are dictating. For a standalone tool such as Speakmac, the dictation app itself also needs microphone access.
If the app is missing from the list, quit it, reopen it, and try dictating again so macOS can show the permission prompt.
3. Reconnect Bluetooth or USB Microphones
For AirPods or Bluetooth headsets:
- Disconnect and reconnect the device.
- If the input meter is still flat, forget the device in System Settings -> Bluetooth, then pair it again.
- Test the built-in microphone to see whether only the headset is failing.
For USB microphones:
- Unplug the microphone.
- Wait a few seconds.
- Plug it into another port if possible.
- Avoid testing through a hub until the microphone works directly.
First make sure the Mac can hear live audio. Then check Dictation settings.
4. Try Dictation Again
Once the input meter moves, open a basic text field and test dictation again.
If Apple Dictation still fails:
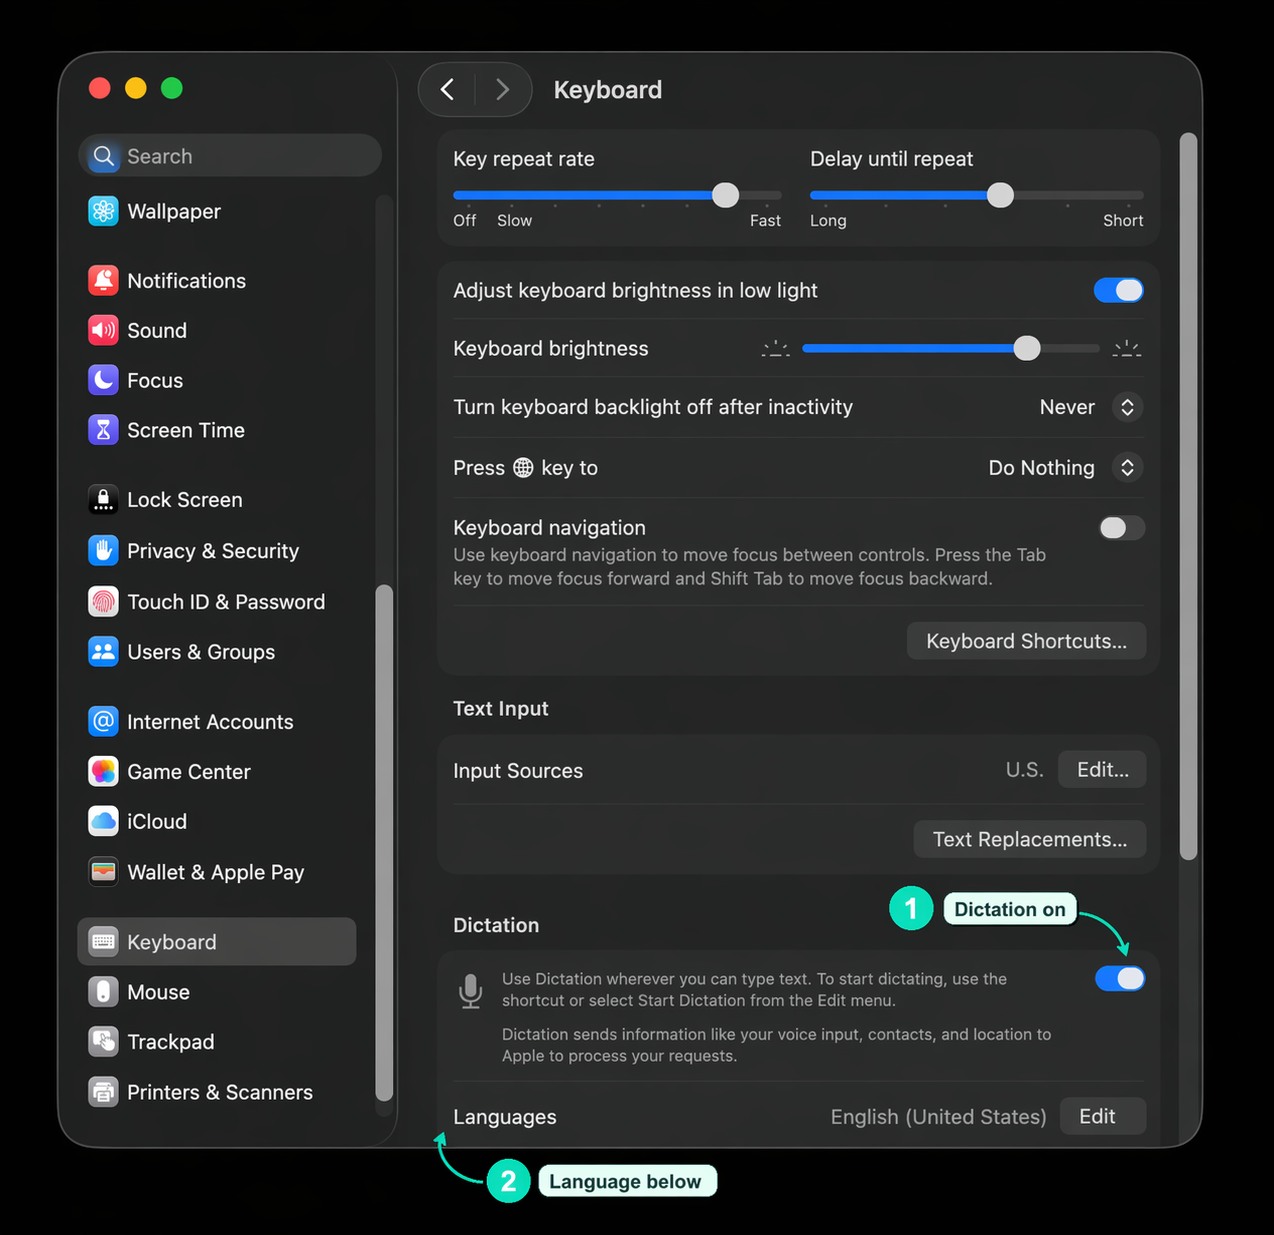
- Toggle Dictation off and on in System Settings -> Keyboard -> Dictation.
- Quit and reopen the app where you are dictating.
- Restart the Mac if dictation is broken across every app.
If a separate dictation app hears you but does not type the text, check Accessibility permission instead of microphone permission.